This week I'm going to feature one photo with a shallow depth of field and one with a deep depth of field. A camera will focus at a single point, but there will be an area in front of and behind this point that still appears sharp. This area is known as the depth of field. It’s not a precisely measured distance, but changes in size and can be described as either shallow--where a narrow area appears sharp, or deep--where the area of sharpness is larger.
I have to say, that I tend to use a shallow depth of field more often than a deeper depth of field. Shallow allows for blurring. Sometimes the background (behind the subject) isn't pleasing to the eye. By using a shallow depth of field, the blurring of foreground and background can help narrow the focus of the image to the subject, and not what is necessarily around the subject. In general, keeping your aperture wide and staying closer to your subject, allows for a shallow depth of field. But it also depends on your camera and your lens.
Below is a photo of a lovely merle Collie done at a local park using a shallow depth of field. Since the area around the Collie was strewn with leaves and tree shadows, I decided to use a narrower focal area. You can see the resulting blur in the background and right up to the foreground of the image.
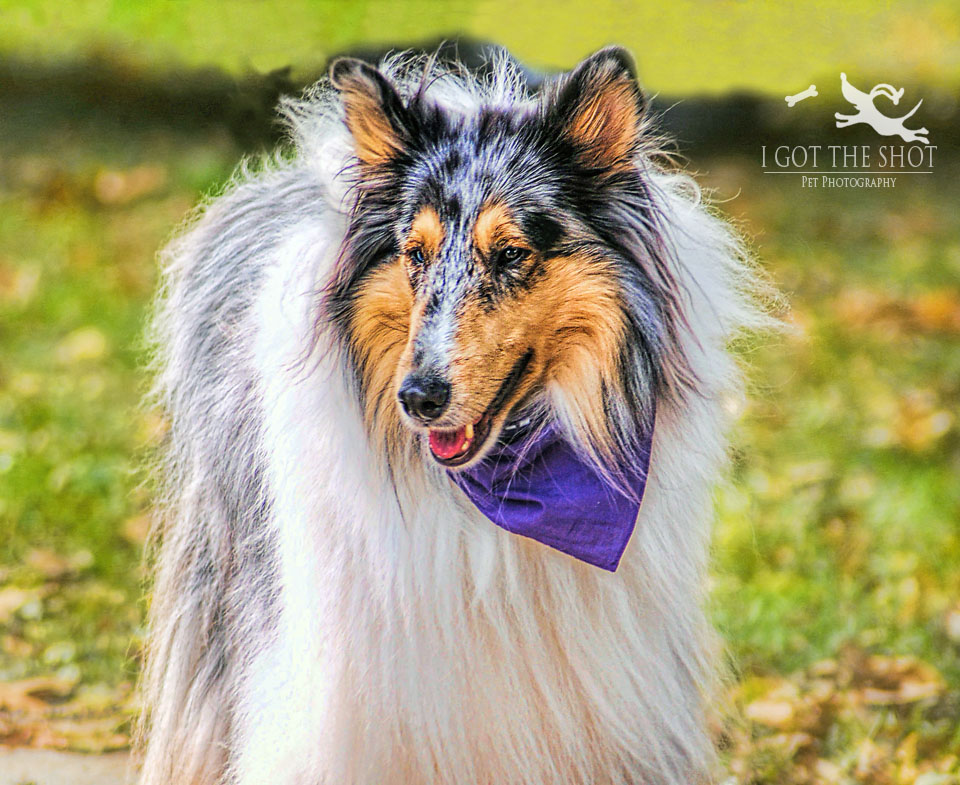
My aperture was set at f/4 on a very bright day, and I was very close to the subject. I used a 50mm lens.
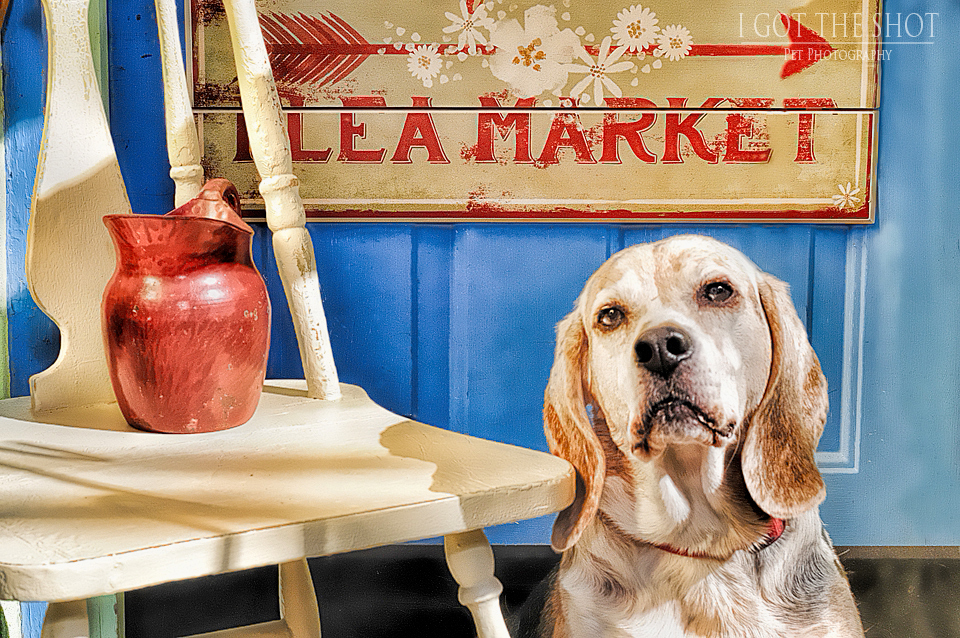
Below, is an image with a deeper depth of field. I am using the same lens (50mm) but with an aperture setting of f/11. I needed to make sure that all of the items surrounding this cute little Beagle man were brought into the picture as well, so using a shallow depth of field would not have worked well here, especially since I wanted the sign to be very visible as part of the backdrop. This is Pup McGraw, and he is one of the dog models for a special project I am working on. If his Mom reads this blog, this will be the first time she is seeing this photo. Surprise!
Below, is an image with a deeper depth of field. I am using the same lens (50mm) but with an aperture setting of f/11. I needed to make sure that all of the items surrounding this cute little Beagle man were brought into the picture as well, so using a shallow depth of field would not have worked well here, especially since I wanted the sign to be very visible as part of the backdrop. This is Pup McGraw, and he is one of the dog models for a special project I am working on. If his Mom reads this blog, this will be the first time she is seeing this photo. Surprise!
You also need to remember to check your speed and ISO settings as well. While changing your focal distance is an option (how close or how far you stand from your subject), it is often best to dial in the correct aperture, speed and ISO to achieve the best results.
Now to see more of this week's theme, start here with Kathie Ono, Ono Pet Photography, and continue onward through the loop until you are back here again.
Now to see more of this week's theme, start here with Kathie Ono, Ono Pet Photography, and continue onward through the loop until you are back here again.
 RSS Feed